Note: Zendesk is deprecating API-token authentication. All new customers must connect Sweo to Zendesk using OAuth.
New non-contracted customers: OAuth is required.
New contracted customers: OAuth becomes required when your workspace is enabled for OAuth.
Existing customers: API-token connections continue working, but if disconnected, reconnection must be done with OAuth. A persistent banner will appear in your Sweo workspace until OAuth is enabled.
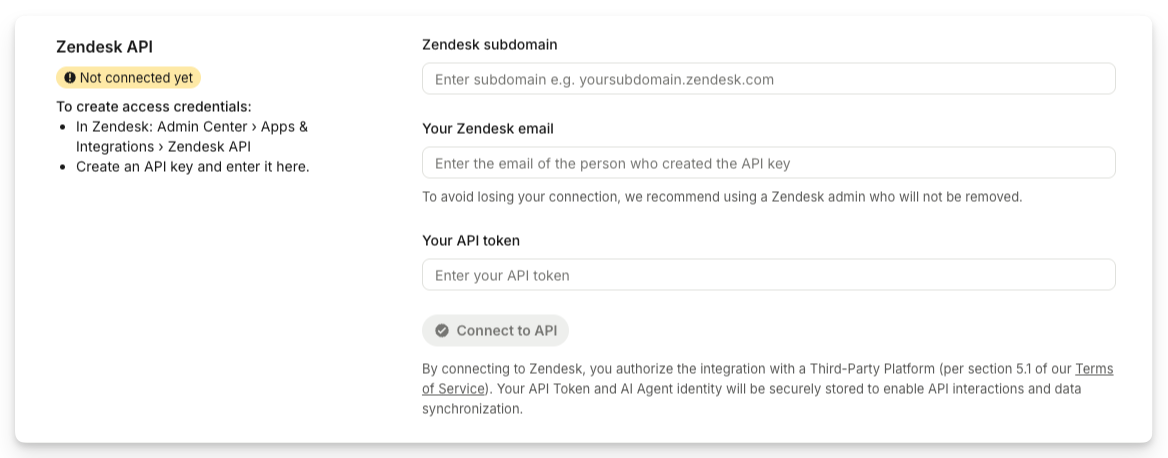
Connect to Zendesk using OAuth
OAuth is now the primary and required method for new customers. To connect:
Under Zendesk API, select Connect.
Approve the OAuth request in Zendesk.
Return to Sweo to confirm the connection shows as Connected.
Tip: OAuth provides secure, token-free authentication and removes the need to manage API keys.
Your data will be automatically synced from Zendesk
Once connected using OAuth, Sweo automatically syncs data from Zendesk every hour.
This includes:
User attributes (People data)
Ticket attributes (Conversation data)
Organization attributes (Company data)
Zendesk schedules
Syncing applies to:
Existing attributes
Newly created attributes
Deleted attributes

Re-sync list data with Zendesk
Sweo allows manual re-syncing for list-type attributes (e.g., dropdowns, single-select fields).
To re-sync:
In Sync data from Zendesk, select the attribute.
Click Re-sync.
This updates the selectable values in Sweo to match Zendesk.

Automatic sync via JWT
If you use Sweo Messenger with JWT authentication, Sweo automatically syncs user and organization fields from Zendesk each time:
The Messenger loads
A new message is sent via Zendesk Messenger
This ensures the most accurate data is available in your Sweo workspace, facilitating more personalized and efficient workflows.
Manage the data that Sweo collects
Sweo names data slightly differently to Zendesk. Below we talk through each type of data available in Sweo, how it maps to Zendesk and how it works. Note that all attributes synced from Zendesk are read-only in the Sweo workspace to preserve data integrity.
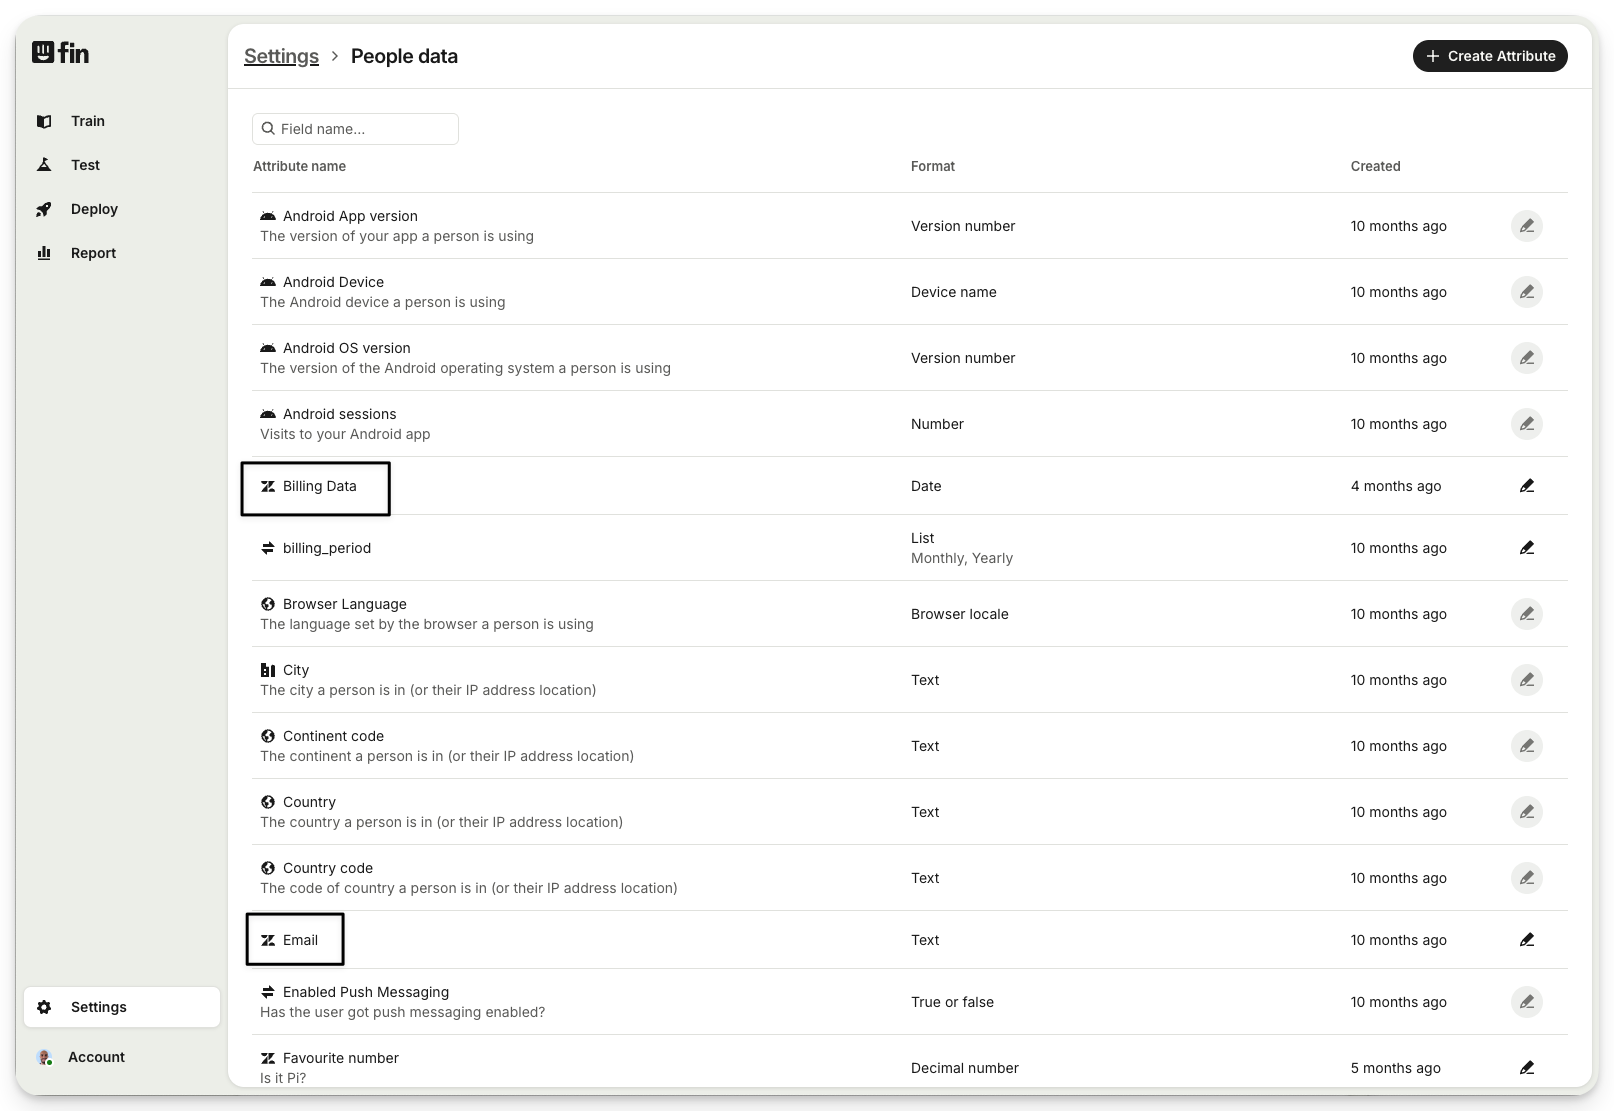
User attributes = People data
Found in Settings > People data
Here you will see the user attributes that were synced from Zendesk (indicated via the Zendesk icon), as well as all of the default people data that Sweo captures, such as operating system, country etc.
All people data captured by Sweo can be passed back to Zendesk.
Its also possible to create new custom people data attributes within the Sweo platform – simply hit "Create attribute" in the top right.
Ticket attributes = Conversation data
Found in Settings > Conversation data
You will see the tickets attributes that were synced from Zendesk (indicated via the Zendesk icon).
All conversation data captured by Sweo can be passed back to Zendesk.
Its possible to create new conversation data attributes within the Sweo platform – simply hit "Create attribute" in the top right.

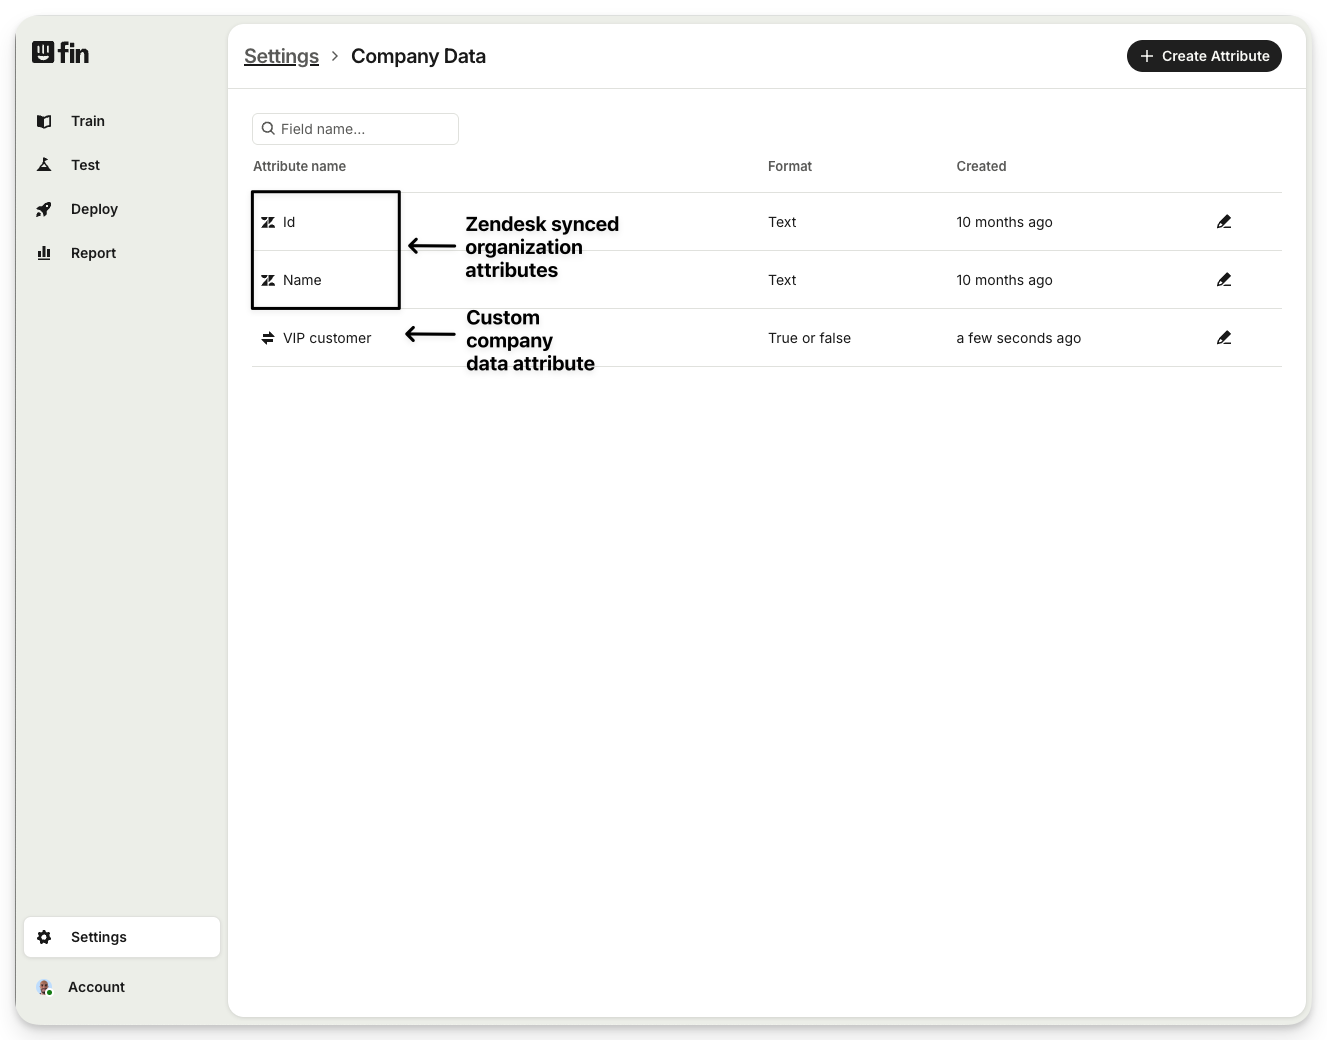
Organization attributes = Company data
Found in Settings > Company data
You will see the organization attributes that were synced from Zendesk (indicated via the Zendesk icon).
All company data captured by Sweo can be passed back to Zendesk.
Its possible to create new company data attributes within the Sweo platform – simply hit "Create attribute" in the top right.
Note:
Attributes synced from Zendesk (marked with the Zendesk icon) are read-only in the Sweo workspace.
Modifications to these attributes need to be made directly in Zendesk and will propagate to Sweo during the next hourly sync.
Syncing over the Zendesk organization 'Multi-select' and 'Lookup' fields is currently not supported.
Zendesk 'tag' fields have specific behavior: only the 'Yes' or 'No' values associated with these tags are synced, not the tags themselves.
Tags are designed to function within Zendesk and cannot be edited directly in the Sweo workspace.
Tags added in the Sweo workspace are not synced back to Zendesk tickets during escalation. Only tags originating in Zendesk and then synced to Sweo can be applied and will appear on the Zendesk ticket.
How tags and data attributes sync during ticket escalation
When Sweo escalates a conversation to Zendesk:
Workflow attributes (set via Set conversation data or AI category detection) sync to Zendesk as ticket fields.
Integration tags such as
fin-involvedare automatically added.Attributes must be set before the hand-off step for correct syncing.
Use your data to construct workflows
Every channel you deploy Sweo to has a workflow, which defines the experience that your end-users go through. Using workflows, you can use your data in several ways...
Create conditional experiences based on certain data points
You can create branches in your workflow which use data to define what should happen next. For example, you might want to define different behaviour for VIP customers.
Populate data and pass back to Zendesk
To pass data back to Zendesk you can either populate that data manually or use AI to categorize it for you – this must be done via your workflow.
To populate data manually, you can add the "Set conversation data" step.
To populate via AI, you can add the "AI category detection" step.
Whichever option you choose, you should do this when using "Hand off to Zendesk agent" or "Create Zendesk ticket" in order to pass the data back to Zendesk onto your Zendesk ticket or live chat.
To ensure all attributes transfer properly during ticket escalation, include data-setting steps (e.g., "Set conversation data" or "AI category detection") before the handoff step in your workflow.
1. Edit the workflow for the Zendesk channel you're using
You'll find this by going to Deploy.
If you've not set up your channel yet, select the channel you'd like to use, and then go to the Workflow step.
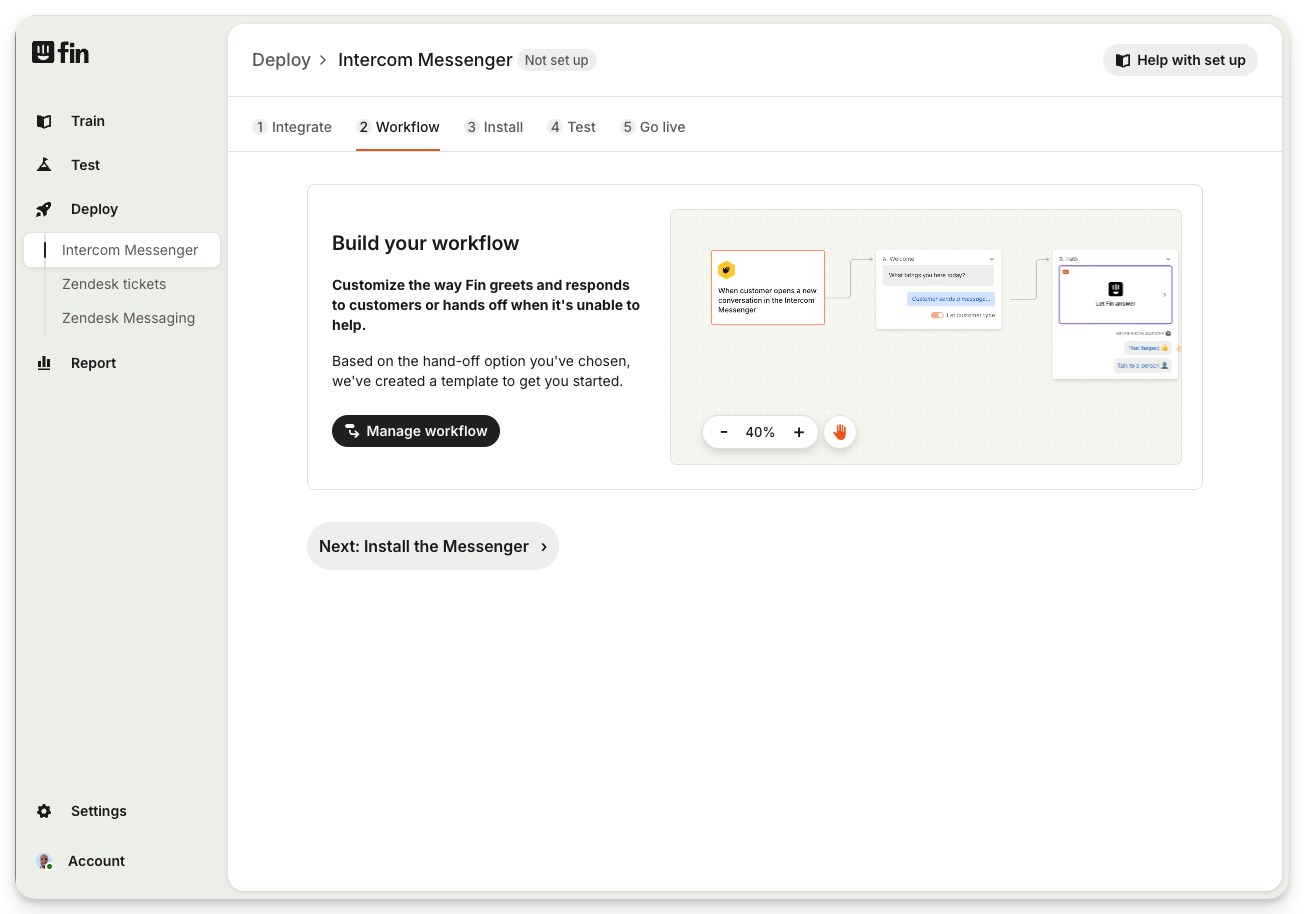
For channels that are set up, just click the name of the workflow next to the channel where you'd like to do this.

2. Add a "Hand off to Zendesk agent" or "Create Zendesk ticket" step to the end of your workflow
Once you're editing your workflow, you can add either the "Hand off to Zendesk agent" step, or the "Create Zendesk ticket" step, depending on which option makes most sense. In the example below, we're using both optons depending on wether its during office hours.

3. Hit "Add step"

4. Select "Set conversation data" or "AI category detection"
Selecting "Set conversation data" allows you manually define what an attribute should be:

| 
|
Selecting "AI category detection" allows you to populate attributes using AI:

If you see "Add description" like in the image above, you'll need to:
| 
|
Note:
If you’re setting up Sweo for Zendesk but don’t see these options under Deploy:
Sweo Messenger
ZD Messaging
ZD tickets
Copilot

…it’s likely you’ve signed up for an Intercom Suite workspace instead. 👇

Sweo for Zendesk is built specifically for Zendesk integration, focusing on ticketing and knowledge base features within Zendesk. It does not include Intercom Suite features like the Intercom Helpdesk or outbound messaging.
Intercom Suite, on the other hand, combines Sweo AI Agent with Intercom’s own Helpdesk, outbound messaging, and customer support tools—but it does not integrate Sweo with your current Zendesk setup.
If you only want Sweo for Zendesk, you have two options:
Delete your Intercom Suite account and then sign up for a free trial of Sweo for Zendesk, or
Log out of your Intercom Suite account and then start a free trial of Sweo for Zendesk using a different email.
FAQs
Can I use synced Zendesk organization attributes to filter Sweo data on the Analyze page?
Can I use synced Zendesk organization attributes to filter Sweo data on the Analyze page?
Not at this time. Zendesk organization (company) attributes are not available as filters in the Analyze section.
Workaround: If you’re using the Sweo Messenger workflow (this does not apply to the Zendesk Tickets workflow), you can create a branch that checks the Organization field and then apply a Tag based on that condition. You can then use this tag for reporting within Sweo.