Sweo audiences are reusable customer segments that you define using People and Company data. You can then apply these audiences across various Sweo features to deliver personalized experiences.
Key principles of how audiences work:
Define once, reuse everywhere: Build powerful audiences from People and Company attributes (e.g.,
plan = Premium,country = IT,>monthly_spend > 10k) to control how Sweo uses content, guidance, data connectors, tasks, and workflows.Default to "Everyone": Any content, guidance, data, tasks, or workflows that are not assigned to a specific audience are considered "untargeted." This untargeted material is available by default to all customers, including those who belong to other audiences.
Create and manage audiences
Step 1: Ensure your helpdesk data is synced
Before setting up audiences based on data attributes, ensure the attributes are synced and available in your Sweo workspace.
To make the attribute usable in audience targeting rules, you need to:
Create the attribute in your helpdesk (e.g. Zendesk or Salesforce).
Wait a few seconds then refresh your Sweo workspace and navigate to Settings > Zendesk / Salesforce integration and click the + icon to see which new fields you can sync over.

Once synced, use the attribute in your audience rules for targeting. 👇
Step 2: Set up audiences for Sweo
To define new audiences for Sweo's content and guidance or manage existing ones:
Go to Settings > Data > Audiences.
Click New audience and give it a descriptive name.

Add audience rules using Person, Company, or Conversation data attributes you have available.

Save the new audience. Once this audience is saved, you can then reuse it across Sweo brand identities, content, guidance, data connectors, tasks, and workflows.
Note:
If you're using synced attributes, you’ll see a live preview of the audience it matches. (Previews are unavailable for conversation data attributes.)
If your attribute isn’t showing in the audience filtering options, it may be because the attribute exists only in your Sweo workspace and is not synced from your helpdesk (e.g. Zendesk or Salesforce). Attributes created solely in your Sweo workspace are used only for filtering reports.
If the attribute still isn’t showing up after syncing, try a hard refresh. The sync may take a few minutes to complete.
Step 3: Apply audiences
Once you've created a Sweo audience, you can use it across various features to provide tailored support to specific groups of customers.
Communication style
Context and clarification
Content and sources
Spam
Other
Escalation Rules
Escalation Guidance
Apply to content:
Go to Train > Content.
Select one or more content items.
Click More actions > Change audience.
Choose the relevant audience(s).

Note:
If no audience is applied, Sweo will use the content for Everyone.
Sweo will use only content relevant to the audience rules during AI answer generation.
Apply to guidance:
Go to Train > Guidance.
Select or create guidance.
Choose the audience from the Audience dropdown.

Apply to escalations:
Go to Train > Escalation.
Select or create an escalation rule or an escalation guidance.
Choose the audience from the Audience dropdown.

Apply to data connectors:
By applying a Sweo audience to data connectors, you can choose which external data sources, like your store or CRM, Sweo can use for each customer group.
Select or create a data connector.
Choose the audience from the Who it's available for dropdown.

Apply to Sweo Tasks:
By applying a Sweo audience to tasks, you can choose which tasks are triggered for each customer group.
Go to Train > Procedures.
Select or create a task.
Click on the task trigger (in edit mode).
Choose the audience from the Audience dropdown.

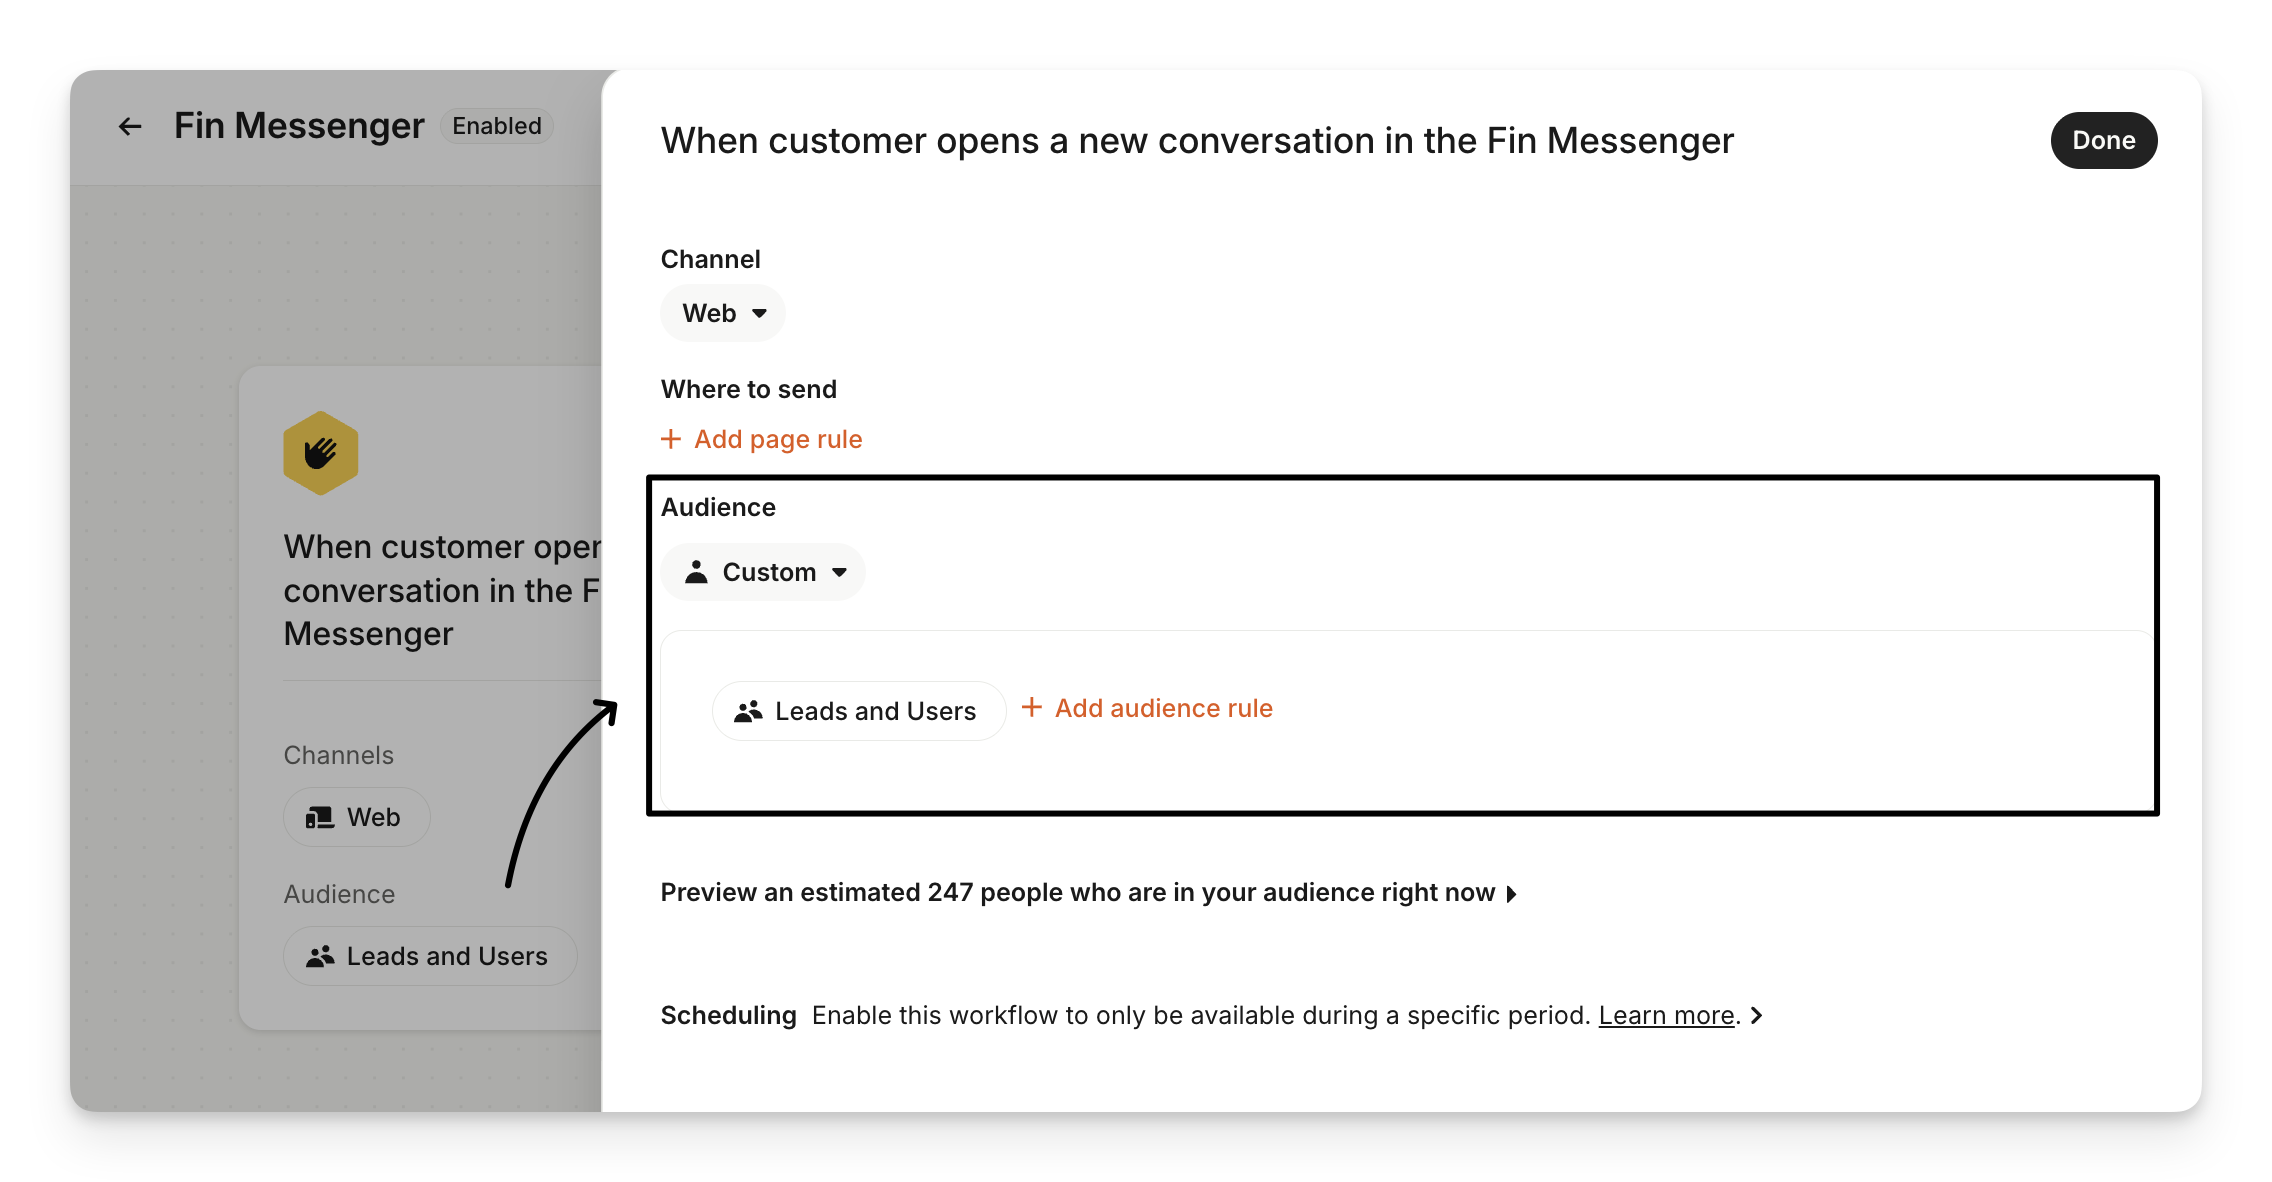
Apply to Sweo workflows:
By applying a Sweo audience to workflows, you can choose which workflows are triggered for each customer group.
Go to Deploy.
Select or create a workflow.
Click on the workflow trigger (in edit mode).
Choose the audience from the Audience dropdown.
Select multiple audiences
It's possible to select multiple audiences for an individual content item or piece of guidance, in this case they are treated like an “OR” rule - so if Audience A and Audience B were selected for the same piece of content, Sweo would be able to use that content for any user that matches Audience A, or Audience B, or both.
Create custom audiences for specific tasks and workflows
You can still create a Custom audience for tasks and workflows using attributes and predicates if you need a specific audience set up for one particular task/workflow. There's also an Everyone option that can be selected to include all users, visitors, and leads.
Improve Sweo with audience-segmented AI suggestions
Use your Sweo audiences to make AI-powered suggestions more accurate and relevant. By segmenting suggestions, Sweo analyzes conversations belonging to specific customer groups to help you identify automation gaps. This allows you to tailor your support content and data to the precise needs of each audience. For a step-by-step guide, see our full article on how to use AI suggestions by audience.
Step 4. Review and test your audience setup
You can review your audience configuration before your customers interact with Sweo. This allows you to see exactly where an audience is being used.
Review your audience setup
Visit Settings > Audiences and select an audience to see a summary of all items where Sweo is using this audience.

Note:
Content is counted at the article, page, or snippet level. This means that if a single website has 1,000 pages, it’ll count as 1,000 articles.
Guidance counts each block of guidance.
Data connectors counts each connector.
Tasks counts each Sweo Task.
Workflows counts each workflow.
Items that are not targeted, are accessible to “Everyone”. This means that they will be counted in the “Everyone" bucket, but also in the count of all existing audiences.
Conducting regular audits of audience configurations ensures continued relevance, correctness, and operational effectiveness.
Validate Sweo's audience rules
You can use Batch Testing to check Sweo's answers for a specific audience.
Go to Test.
Select the Audience you want to test from the "Testing as" dropdown menu.
Review Sweo's answers to the test questions to ensure they are accurate for that customer segment.
You can also use Sweo previews to quickly check Sweo's answers or behavior in the context of adding new content, guidance, etc.
Troubleshooting
Unrestricted audience causing unintended access
Issue: An article meant for a specific audience appears for other users because the audience is configured as "Everyone" or lacks any restrictive rules.
Resolution:
Create a targeted audience:
Navigate to Settings > Data > Audiences.
Click on New audience, name the audience, and add rules based on attributes such as Person, Company, or Conversation.
Save the audience.
Apply the Audience to Content:
Go to Train > Content.
Open the article’s Details panel.
In the Audience section, select the audience you’ve created with restrictive rules. Note: Avoid using an “Everyone” audience (no rules) for articles that should be visible only to specific users.
Overly broad audience rules
Issue: Content targeted for one audience appears for users outside the intended group because of overly broad rules. For example, an audience rule that matches "Company ID starts with Example" may apply to multiple users whose company IDs include "Example".
Resolution:
Refine the audience rule by using more specific conditions to uniquely define the intended audience. This might involve adding constraints such as exact matches or additional conditions to narrow down eligible users.