You can install Sweo Messenger on your Salesforce site using a pre-built package. Once installed, you’ll configure custom settings, update your content security policy (CSP), and connect Sweo securely to your Salesforce environment.
Install Sweo Messenger on a Salesforce webpage
1. Install the package in Salesforce
To install Sweo Messenger on a Salesforce webpage, we've created a package you can install, which simply creates a custom setting definition.
You'll need to install the package in your Salesforce environment, before following the steps below.
Or
2. Configure Sweo Messenger settings in Salesforce
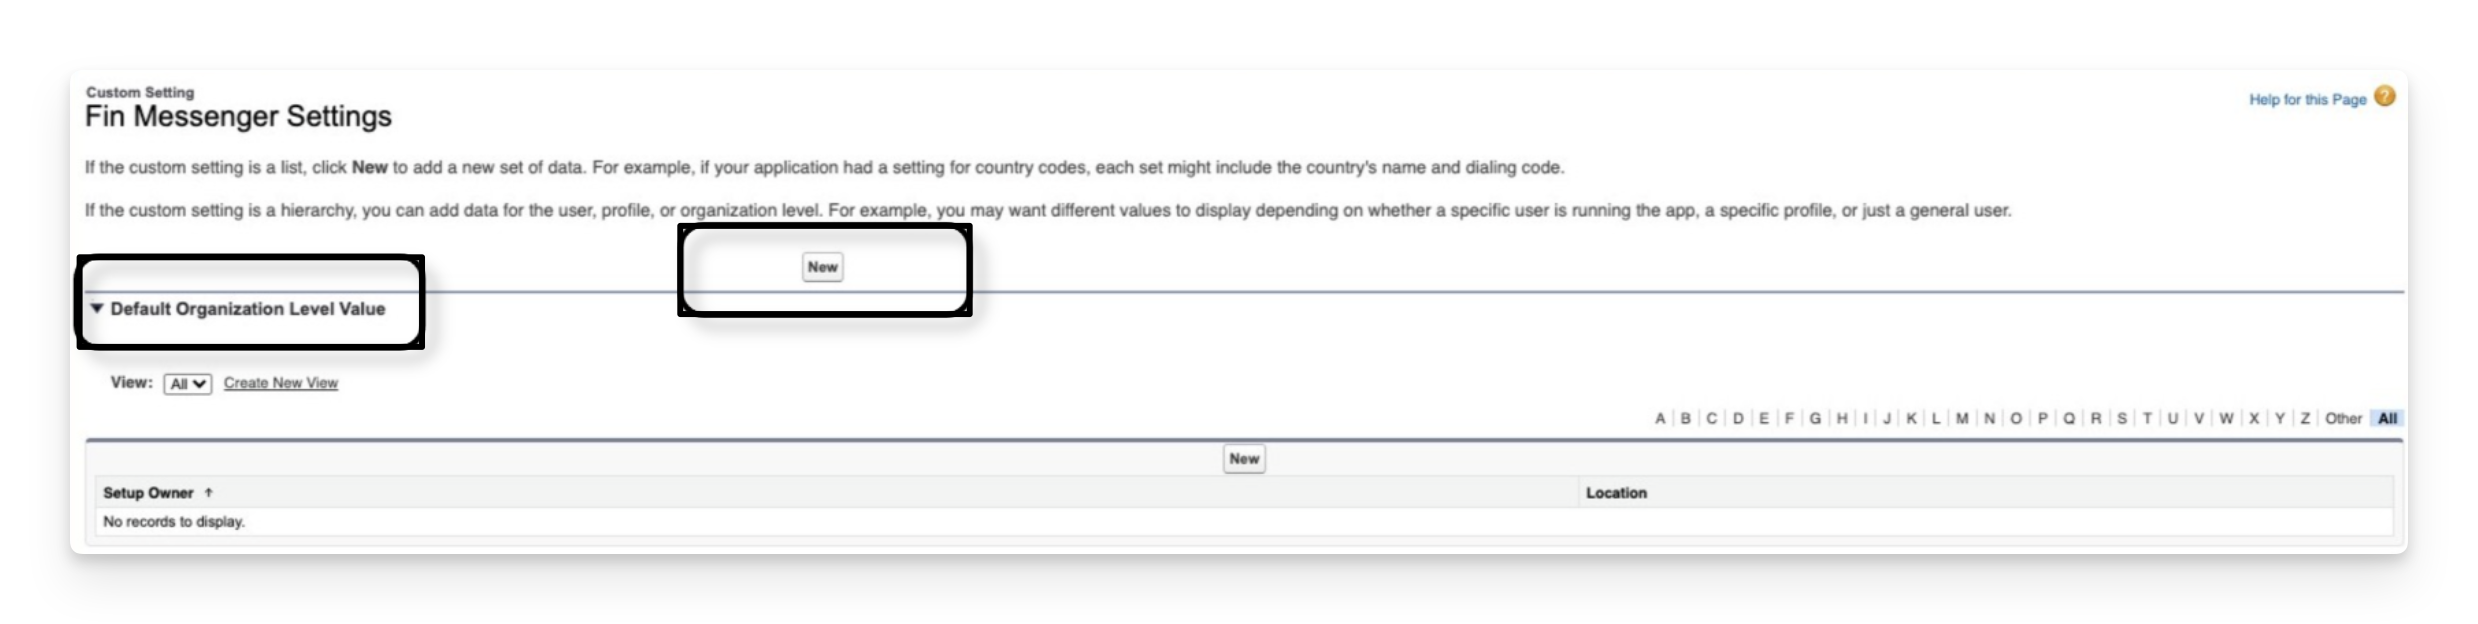
After installation, you’ll see a new custom setting called Sweo Messenger Settings. You’ll use this to connect Salesforce with your Sweo app credentials.

A) Access Sweo Messenger Settings
In Salesforce:
Go to Setup > Custom Settings.
Open Sweo Messenger Settings.
Click Manage.
Click New to set the Default Organization Level Value
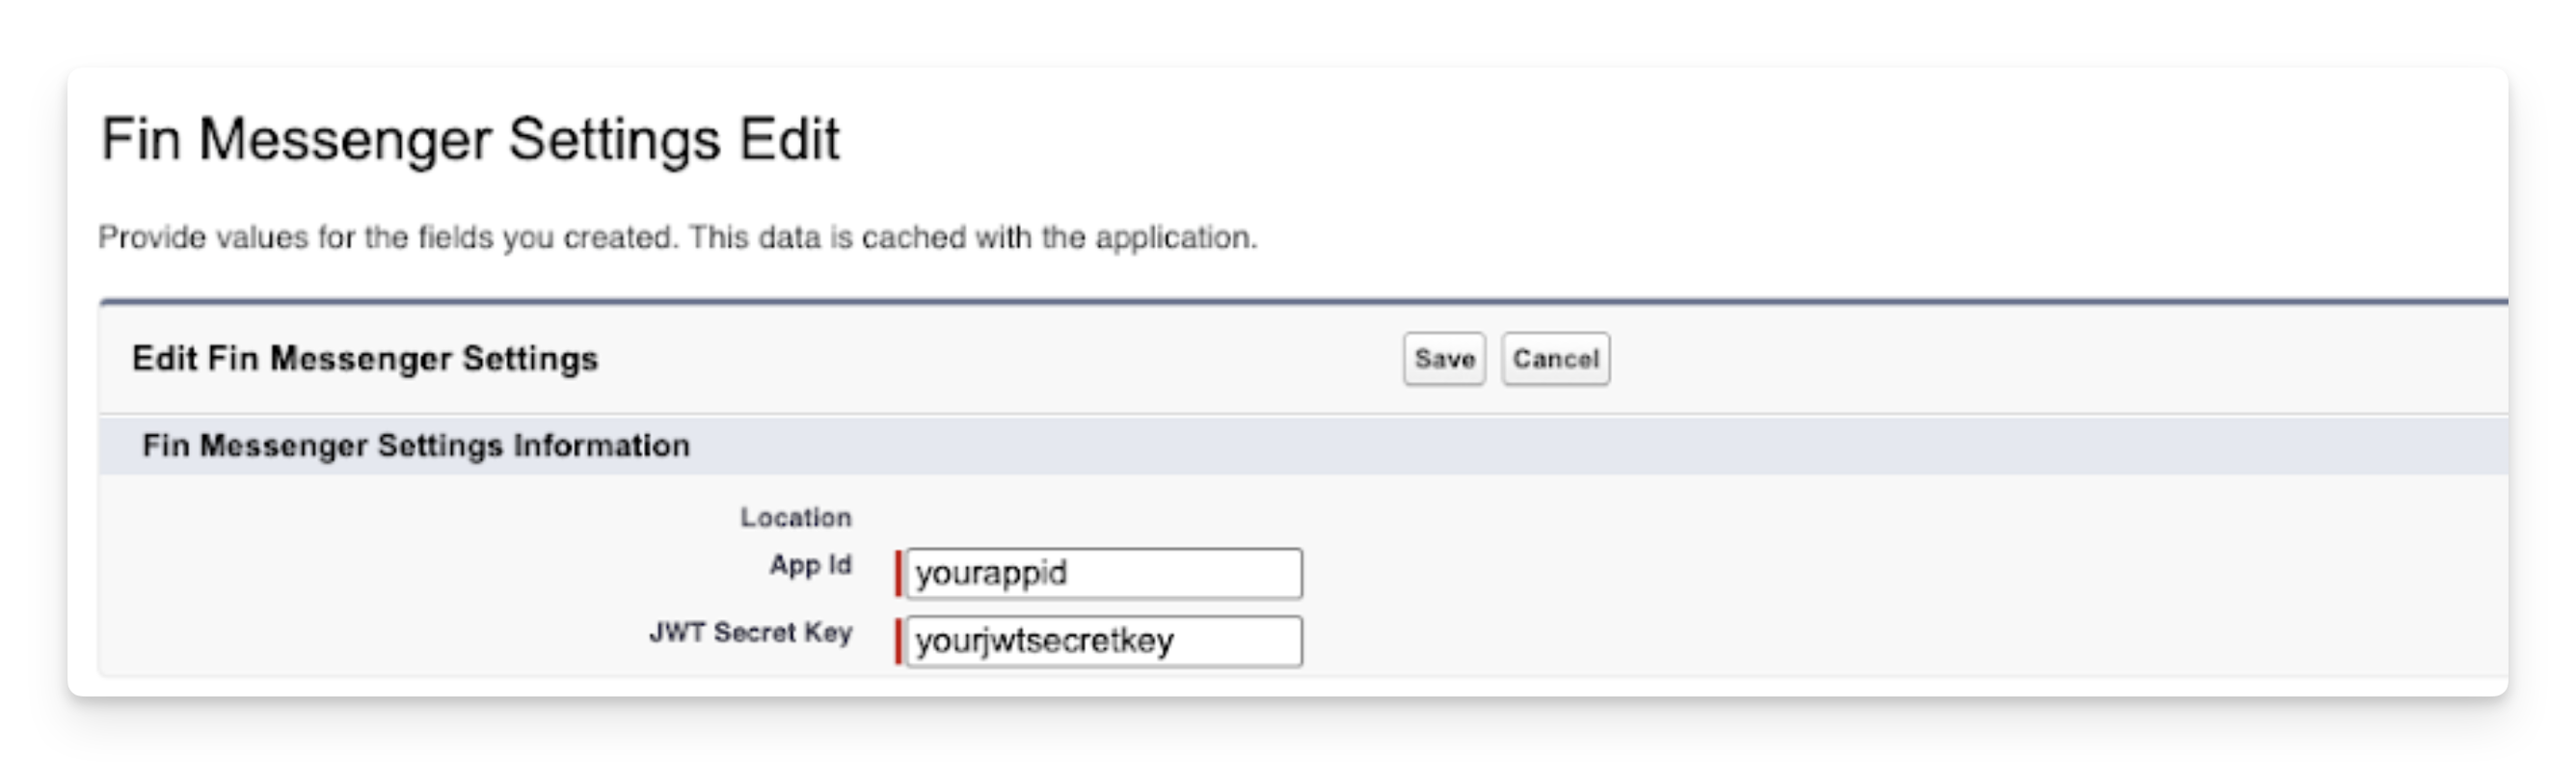
B) Configure the App ID custom field
In Sweo, go to Settings > General to find your App ID.
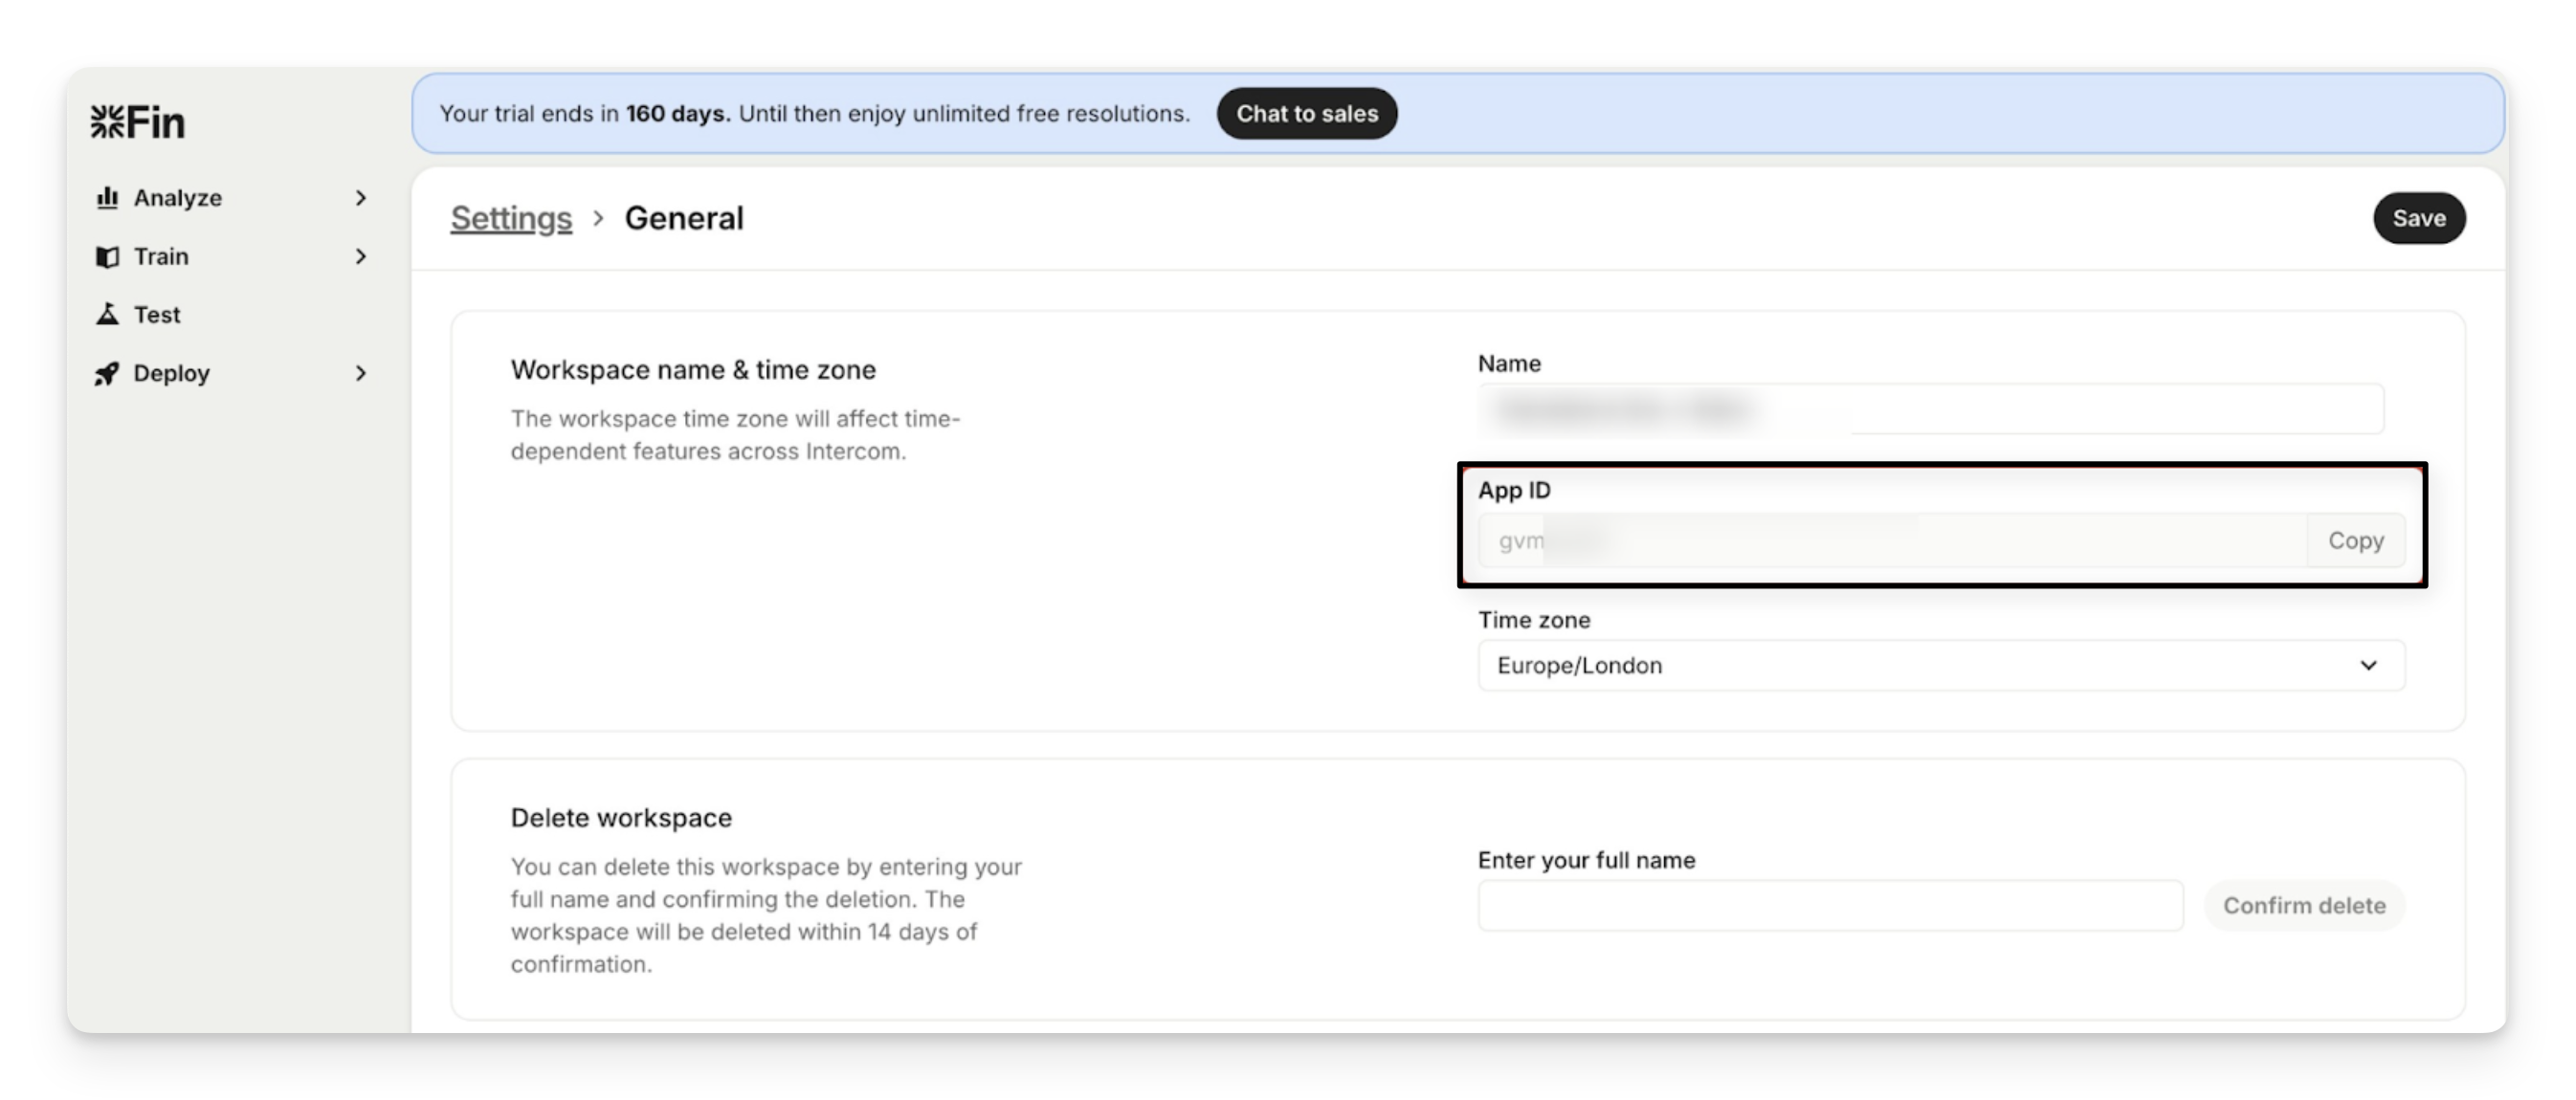
In Salesforce, open Sweo Messenger Settings.
Enter your App ID in the App ID custom field.

C) Configure the JWT Secret Key custom field
In Sweo, go to Settings > Sweo Messenger to find your JWT Secret Key.

In Salesforce, open Sweo Messenger Settings.
Enter your JWT Secret Key in the JWT Secret Key custom field.
3. Configure content security policy (CSP)
Once your Sweo Messenger settings are configured, set up the required CSP rules to allow Sweo Messenger to load securely.
A) Access Site Security & Privacy
In Salesforce:
Go to Setup > Sites > (your site) Builder.
Open Settings > Security & Privacy.
B) Configure Security Level
Set the Security Level to Relaxed CSP. This allows you to add the required script to the site’s head markup.

C) Configure Trusted Sites for Scripts
Add these trusted sites:
https://widget.intercom.io – loads the messenger
https://js.intercomcdn.com – loads additional assets

D) Configure Trusted URLs
Go to Setup > Trusted URLs.
Add the URLs from this article with the relevant CSP directives.
Set CSP Context to All or Experience Builder Sites.
4. Add the Sweo Messenger script to your Salesforce portal
Add the following JavaScript to your site’s Head Markup.
This script listens for the finMessengerData event, then dynamically loads Sweo Messenger with the encoded JWT and App ID.
  window.addEventListener('finMessengerData', function (e) {
    const finMessengerData = e.detail;

    // Do not boot if no JWT
    if (finMessengerData.jwt == null) {
      return;
    }

    window.intercomSettings = {
      app_id: finMessengerData.appId,
      intercom_user_jwt: finMessengerData.jwt,
      api_base: "https://api-iam.intercom.io"
    };

    loadIntercom(finMessengerData.appId);
  });

  function loadIntercom(appId){var w=window;var ic=w.Intercom;if(typeof ic==="function"){ic('reattach_activator');ic('update',w.intercomSettings);}else{var d=document;var i=function(){i.c(arguments);};i.q=[];i.c=function(args){i.q.push(args);};w.Intercom=i;var l=function(){var s=d.createElement('script');s.type='text/javascript';s.async=true;s.src='https://widget.intercom.io/widget/'+appId;var x=d.getElementsByTagName('script')[0];x.parentNode.insertBefore(s,x);};if(d.readyState==='complete'){l();}else{if(w.attachEvent){w.attachEvent('onload',l);}else{w.addEventListener('load',l,false);}}}}
Important: The api_base value will need to be updated based on your regional location, see the table below to pick the right value:
Regional location | API base to set |
US |
|
EU |
|
Australia |
|
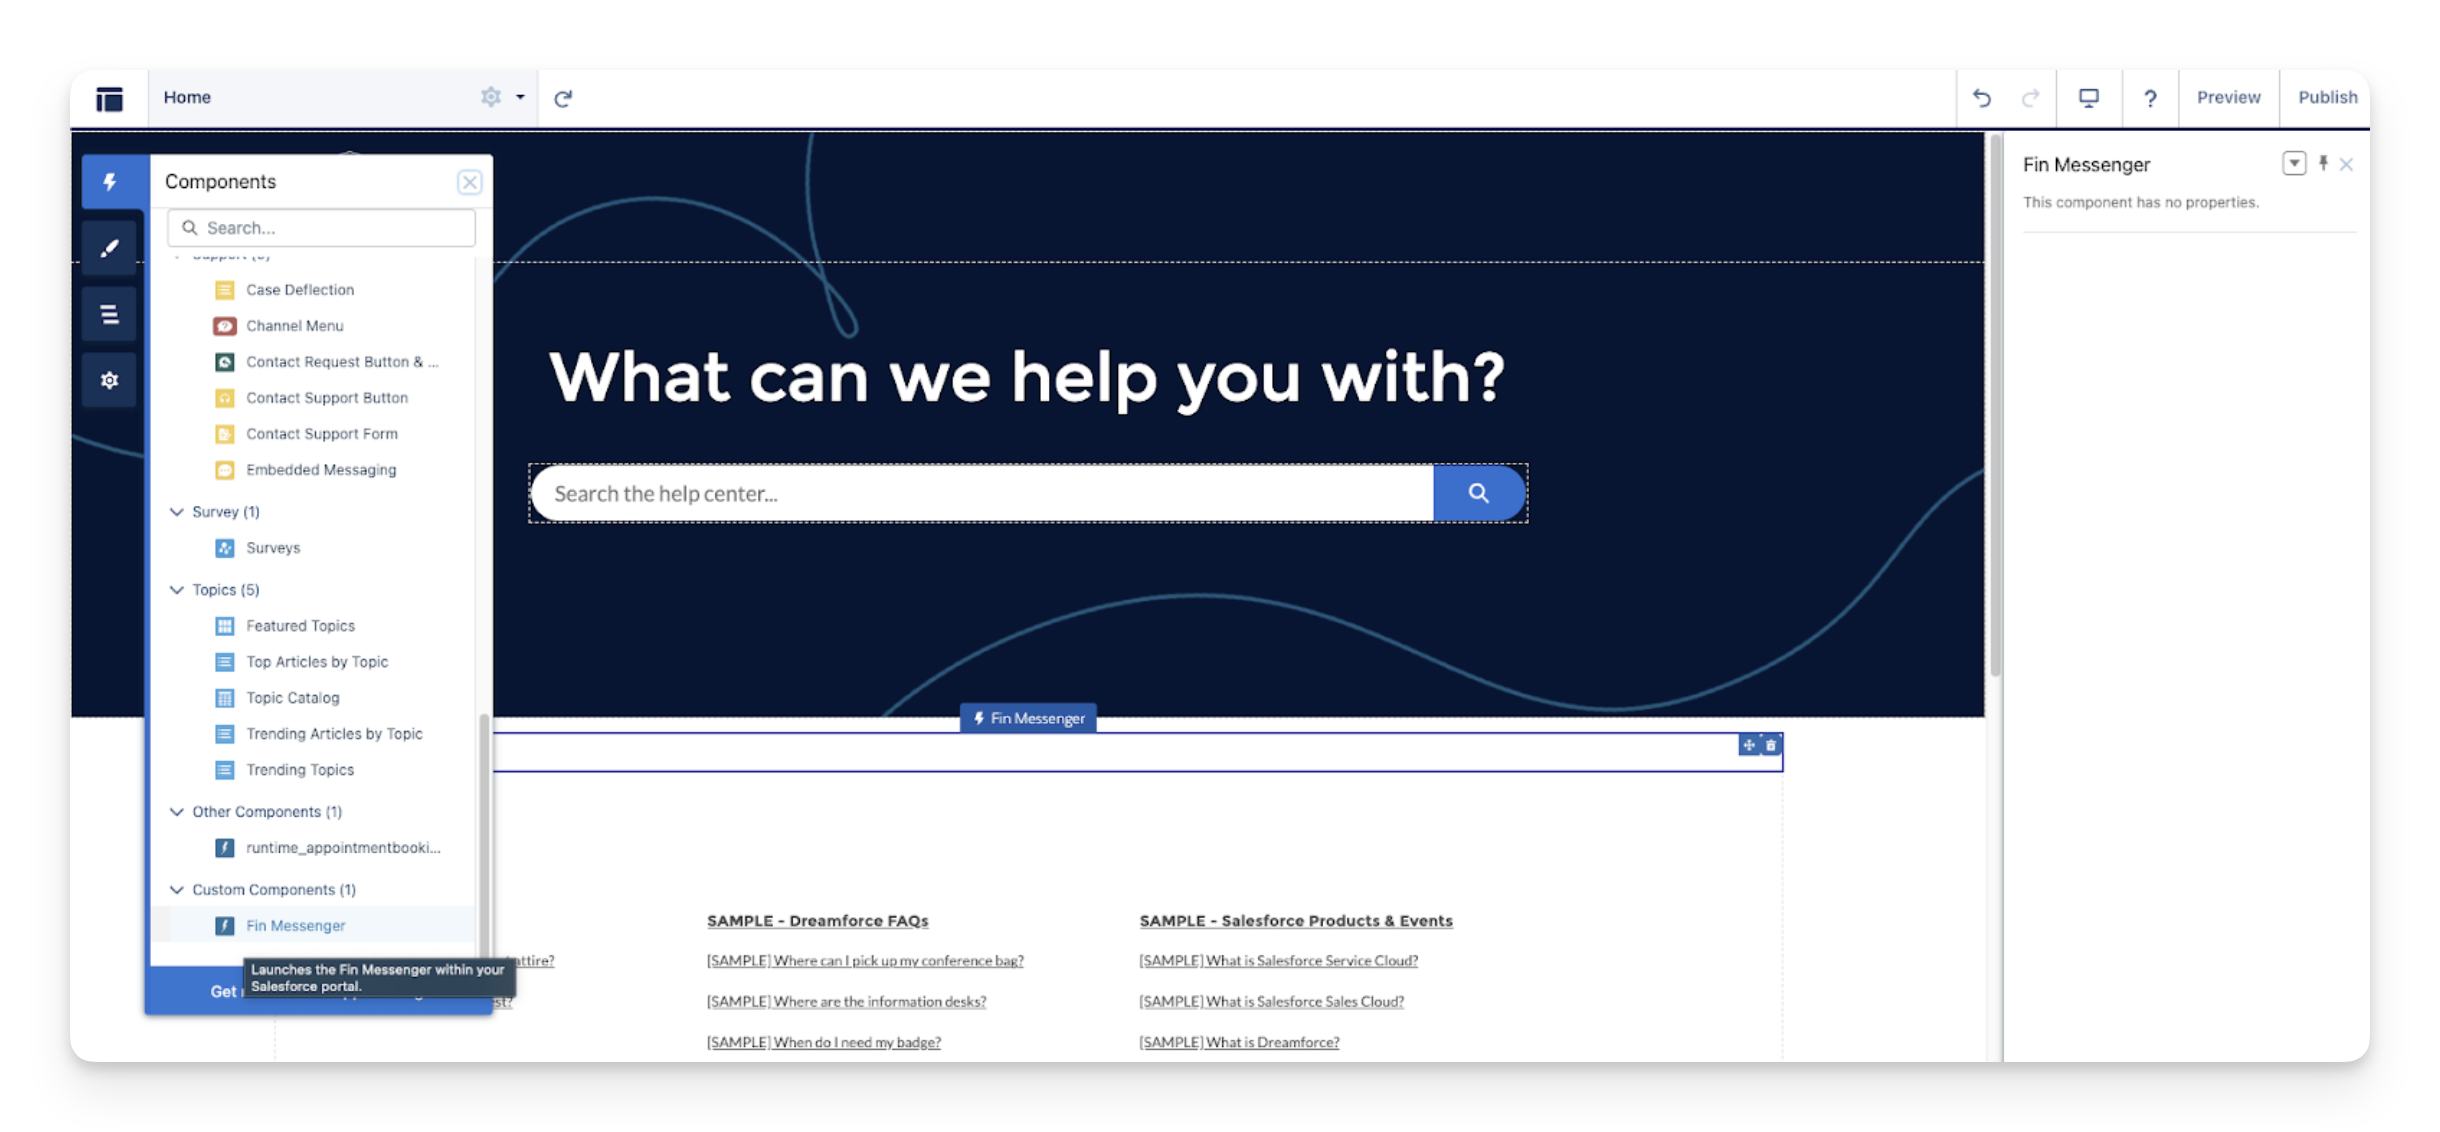
5. Add the Sweo Messenger component to your Salesforce webpage
In Salesforce:
Go to Setup > Sites > (your site) Builder.
Drag and drop the Sweo Messenger component onto your portal page to deploy it.
6. Edit the Apex Class to control user data sent to Sweo
In Salesforce:
Go to Setup > Apex Classes > JwtGenerator.
Click Edit.

You can:
Update the Salesforce query to define how current user information is retrieved.
Choose which field sets the
userIdfor unique user identification.Append to
additionalAttributesto include more user data attributes sent to Sweo.
FAQs
How do I find my Sweo App ID?
Go to Settings > General. Your App ID is listed under the App details section.
Where can I find the JWT Secret Key?
In Settings > Sweo Messenger, copy your JWT Secret Key.
What if the messenger doesn’t load?
Check your CSP settings. Ensure both trusted script URLs and trusted URLs are configured correctly and the security level is set to Relaxed CSP.
Can I restrict which user data is sent to Sweo?
Yes. Edit the JwtGenerator Apex Class to customize which user fields and attributes are included.